To implement an extended custom data source, you perform the following programming and configuration tasks:
Develop an open data access (ODA) data driver to connect to and retrieve data from a data source.
Develop a query builder that prompts the user to select data, processes the user’s selection, and creates the query to get the data.
Configure the custom data source for use with Report Studio.
An example of an extended ODA data source installs with Report Studio. The data source accesses data from an integrated sample database named ClassicModels. To test this custom data source with Report Studio, you must first enable the data source, named OdaSampleExt, by setting the data source’s <enabledInEnterpriseMode> attribute in erni_config.xml to true. The erni_config.xml file is stored in the following locations:
Listing 3‑7 shows in bold the <enabledInEnterpriseMode> attribute whose value you change from false to true. Look for the ODA data source named OdaSampleExt.
Listing 3‑7 Configuring the extended sample data source in erni_config.xml
<odaconfig>
<name>OdaSampleExt</name>
<displayName>Extended sample ODA data source</displayName>
<description>An extended sample ODA data source</description>
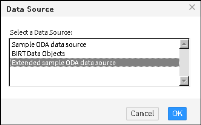
After you enable the extended sample data source, restart the appropriate Windows service, and open Report Studio. When prompted, select one of the standard report templates. The Data Source dialog box, as shown in Figure 3‑20, prompts you to select a data source. Select Extended sample ODA data source.
Figure 3‑20 Selecting a data source
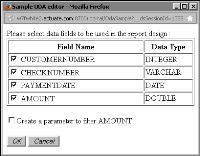
A query builder page, as shown in Figure 3‑21, prompts you to select the data to use in the report.
Figure 3‑21 Building a query
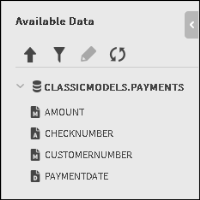
After you select the data and choose OK, the query builder closes, and the data you selected appears under Available Data, as shown in Figure 3‑22.
Figure 3‑22 Selected data appears under Available Data
Developing an open data access (ODA) data driver
You develop an ODA data driver by implementing run-time interfaces that the ODA framework defines. The ODA framework is an Eclipse Data Tools Platform (DTP) project component that provides a way for an application to access data from standard and proprietary data sources. For information about ODA and developing data drivers, go to the following site:
Another resource is Addison-Wesley’s Integrating and Extending BIRT book. Actuate also provides an example about how to develop a flat file ODA driver. You can find the source code for this example in:
<ACTUATE_HOME>\oda\examples\FlatFileExample
The extended data source example uses a predefined ODA JDBC driver to connect to the ClassicModels sample database. The source code for this driver (org.eclipse.birt.report.data.oda.jdbc) is available in the Eclipse DTP CVS repository.
After you develop a custom ODA driver, you must copy the driver to the following folders, depending on the deployment environment: