This section describes how to use the command-line installer to install BIRT iHub with Visualization Platform and System Console on a Windows machine at the same time. To install a single BIRT iHub module, see Installing individual BIRT iHub modules on Windows.
Perform the procedures in this section only if you do not have BIRT iHub already installed on your system. If you purchased BIRT iHub Release 3 or a fix release and installed the files that you downloaded, you can upgrade to BIRT iHub Release 3.1 by following the instructions in Upgrading to Visualization Platform 3.1 and Upgrading to System Console 3.1.
System Console creates a default cluster automatically. If you install System Console and BIRT iHub on the same machine at the same time using the procedure described in this section, System Console automatically adds the machine on which you installed these modules as a node and adds the default volume to the default cluster. If you install System Console individually either on the same machine as BIRT iHub or on a separate machine, you must add a node and a volume to the default cluster after installing System Console. For information on installing System Console and BIRT iHub individually, see Installing individual BIRT iHub modules on Windows. For more information on clustering, see Chapter 5 “Managing Clusters,” in the System Administration Guide.
When installing more than one BIRT iHub module at the same time, the administrator performs the following tasks:
Downloads the BIRT iHub installation package, iHub3.zip, from the software download site.
Downloads the zip and zip.MD5 file pair or pairs for each module the administrator is installing from the download site. By default, the install script installs System Console and BIRT iHub with Visualization Platform. Installing these modules requires that the administrator download the following file pairs from the download site:
SystemConsole.zip and SystemConsole.zip.MD5
ActuateBIRTiHub.zip and ActuateBIRTiHub.zip.MD5
Creates a new folder and unzips the iHub3.zip file into the folder.
Reviews the software license agreement.
Updates the installation properties file.
Runs the install script, install.bat.
How to install multiple BIRT iHub modules on Windows
1 Download the iHub3.zip file from the software distribution site.
2 Download the zip and zip.MD5 file pair for each BIRT module you are installing from the modules folder at the software distribution site to one folder.
3 Create a new folder into which to extract the files that iHub3.zip contains. This folder must be outside C:\Program Files or C:\Program Files (x86), for example, C:\Actuate3.
4 Extract the contents of iHub3.zip to C:\Actuate3. Unzipping iHub3.zip creates the installation folder, C:\Actuate3\iHub3.
5 Navigate to C:\Actuate3\iHub3\License.
6 Open and read the file, license.txt. You must agree to the license terms to install BIRT iHub modules. In step 8.6, you indicate whether you accept the license terms or whether you want the install program to prompt you for whether you accept the terms.
7 Navigate to C:\Actuate3\iHub3.
8 Using a text editor, open the acinstall.properties file. Using the example shown in Listing 2‑1, perform the following tasks:
1 For ac.login, specify the machine and account name for the machine onto which you are installing the BIRT iHub modules. For ac.password, specify the account name password.
For ac.package, accept the default value of a,b to install System Console and BIRT iHub with Visualization Platform.
2 Modify the ac.homedir property to specify the absolute installation folder path if you do not run the install script, install.bat, from the installation folder.
3 Leave ac.downloadonly set to false.
4 For ac.source, specify the absolute path to the folder containing the zip and zip.MD5 file pairs that you downloaded in step 2. For example, if you downloaded these file pairs to C:\BIRT_component_archive_files, specify C:/BIRT_component_archive_files for ac.source, using a forward slash in the pathname. The delimiting character in a pathname in acinstall.properties must be a forward slash.
5 To run BIRT iHub processes as Windows services, set ac.runasservice to true. Then, set ac.runasservice_username to the user name and ac.runasservice_password to the user password for the account that runs the services. If these two properties are blank, BIRT iHub services run as the local system account. Set ac.runasservice to false to see open command prompts for iHub server and PostgreSQL services after installation is complete.
6 For ac.acceptlicense, accept the default value of prompt for the install script to prompt you for whether you accept the software license terms when you run the script. Alternatively, specify y for yes, to accept the software license terms.
7 Uncomment ac.ihub_cluster_schema_name and ac.ihub_postgres_port, setting these two properties to the cluster schema name and PostgreSQL RDBMS port, if necessary.
8 Save and close the file.
Listing 2‑1 acinstall.properties
#Tue, 11 Jun 2013 16w:19:16 -0700
ac.login=URUP/Administrator
ac.password=password
ac.package=a,b
# Please use forward slashes for the home fully qualified path
# on Windows OS, for example ac.homedir=D:/iHub/distribution
ac.homedir=.
ac.downloadonly=false
# Please use forward slashes for the source network path on
# Windows OS, for example ‘source’=//fs/installDir/iHub
# /distribution
ac.source=C:/BIRT_component_archive_files
ac.runasservice=true
ac.runasservice_username=
ac.runasservice_password=
# The license agreement (license.txt) file is located in the
# ./License directory
# The default value of the ac.acceptlicense parameter is set to
# 'prompt', which requires the user to read the license
# agreement before accepting it
# Before starting a network/silent install, read the
# license.txt file and change the value of the ac.acceptlicense
# parameter to 'y' to confirm that you agree to the terms of
# the license agreement
# ac.acceptlicense=prompt
ac.acceptlicense=y
#Advanced Settings
#ac.ihub_cluster_schema_name=
#ac.ihub_postgres_port=
9 Open a command prompt having administrator privileges by performing the following tasks:
1 In Windows, choose Start.
2 In Search programs and files, type cmd. Press Ctrl+Shift+Enter.
10 Navigate to the installation folder, for example, C:\Actuate3\iHub3.
11 Type install, and press Enter to execute the installation script. Alternatively, you can navigate to the installation folder using Windows Explorer and double click the install.bat file to execute the script.
The command prompt displays the message “Unable to locate tools.jar.” You can safely ignore this message.
If you specified 'prompt' for the ac.acserverlicense property in acinstall.properties, the install script displays the contents of <installation directory>/License/license.txt. Read the licensing terms. Then, type y for yes to accept the licensing terms and continue the install.
The install script displays a series of status messages regarding the progress of the installation process, as shown in Listing 2‑2:
Detects and confirms administrative permissions
Extracts and installs System Console
Extracts and installs BIRT iHub with Visualization Platform
Displays BUILD SUCCESSFUL message indicating installation is complete.
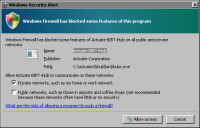
If a Windows Security Alert appears indicating that the firewall is blocking access to Actuate BIRT iHub programs, as shown in Figure 2‑1, perform the following tasks:
Figure 2‑1 Allowing firewall access to Actuate BIRT iHub
1 In Allow Actuate BIRT iHub to communicate on these networks, for example, select Private networks, such as my home or work network, then choose Allow access.
2 Repeat this step for other Windows Security Alerts, such as Java Platform SE binary.
When the script finishes running, press any key to exit the script, as shown in Listing 2‑2.
Unable to locate tools.jar. Expected to find it in C:\Actuate3\iHub3\java\lib\tools.jar
[echo] Downloading from given file system location
[echo] Verifying Checksum...
[echo] Completed verification
[echo] Extracting package System Console
[echo] Installing System Console. This may take a few minutes...
[echo] To access System Console, use URL: http://localhost:8500/sysconsole
[echo] Downloading from given file system location
[echo] Verifying Checksum...
[echo] Completed verification
[echo] Extracting package Actuate BIRT iHub
[echo] Installing Actuate BIRT iHub. This may take a few minutes...
[echo] Using default PostgreSQL database port number 8433
[echo] Using default schema name
[echo] To access Information Console, use URL: http://localhost:8700/iportal
[echo] Setup Completed
INSTALL SUCCEEDED
Total time: 12 minutes 54 seconds
Press any key to close this window
A new browser window opens and the System Console Login appears. For information about accessing System Console, See Chapter 3, “Setting up BIRT iHub.”